Sunday, 28 September 2014

Unknown  /  2:26 pm  /  , , ,   /  No comments

Now-a-days almost all 3rd party software require Microsoft .NET Framework installed in your system. The required .NET Framework version might be different for different software and the most required .NET Framework version is 3.5 which comes preinstalled in Windows 7.
If you are using Windows 8, you might face a problem while trying to run a program which requires .NET Framework 3.5 version. Windows 8 doesn't come with .NET Framework 3.5 version. It comes with the latest .NET Framework 4.5 version preinstalled.
Whenever you try to open a program requiring .NET Framework 3.5, you get following message:
An app on your PC needs the following Windows feature:
.NET Framework 3.5 (includes .NET 2.0 and 3.0)
There are 2 buttons given to install the .NET Framework version or to skip the installation. If you decide to install it, Windows tries to connect to Internet to download the setup files of .NET Framework 3.5.
That's strange because Windows 8 setup contains .NET Framework 3.5 setup files but still Windows tries to connect to Internet. It would have been better and easier if Windows 8 installed the .NET Framework 3.5 without Internet connection just like it does for other Windows components such as Media Center, Internet Explorer, etc which can be installed or uninstalled using "Programs and Features" applet in Control Panel.
If you don't have an Internet connection or if you don't want to waste time and bandwidth in downloading the setup files, here is a way to install .NET Framework 3.5 offline in Windows 8.
Today in this tutorial, we'll tell you how to install .NET Framework 3.5 in Windows 8 without any need of Internet connection. You can install it offline with the help of a single command. This method requires Windows 8 setup disc or ISO file so make sure you have Windows 8 setup files with you.
 The following are the steps to enable .NET Framework 3.5 (include .NET 2.0 and 3.0) feature in offline mode :

Step 1 :
Insert Windows 8 DVD or mount ISO image. The source of this feature can be found in folder E:\sources\sxs. (In this case E:the user’s drive letter on which the user has loaded Windows 8 Media.)


Step 2 :
Open CMD.EXE with Administrative Privileges. 

Step 3 :
Run the following command Dism.exe /online /enable-feature /featurename:NetFX3 /All /Source:E:\sources\sxs /LimitAccess, and hit Enter. 
After completing the installation of .NET Framework 3.5 you can see that the feature is enabled!

Sunday, 31 August 2014

Unknown  /  8:02 am  /  , ,   /  No comments
Nintendo revealed today its New Nintendo 3DS system, an upcoming version of the 3DS hardware that features a second stick built in, in addition to new shoulder buttons.
The new system was confirmed today during the Japanese Nintendo Direct. The New Nintendo 3DS and New Nintendo 3DS LL feature a smaller analog "nub" above the A, B, X and Y buttons. Likewise, existing buttons have been colored to match the old-school SNES controller.
The hardware will also arrive with new shoulder buttons which will be situated next to the existing ZL and ZR buttons. Check out a front-on view below.
  Additionally, the system will features a better CPU than previous models, according to Nintendo, which allows for faster eShop browsing and downloading. The New Nintendo 3DS' more powerful internals will be used for at least one game, Xenoblade Chronicles, which is being developed exclusively for the updated hardware.
It is also set to come with a built-in NFC on the bottom touchscreen for the upcoming launch of the amiibo NFC figures, while sliding custom covers will also come with the device, allowing owners to customize the hardware. Nintendo also claims that stereoscopic 3D will also be better than it was in previous devices.

Both models are scheduled to launch in Japan on Oct. 11.
We've reached out to Nintendo for details of a North American release; however, the company has already confirmed no New Nintendo 3DS system will launch for North America or Europe this calendar year.


Subscribe For More Posts Right Into Your E-Mail Inbox!

Sunday, 3 August 2014

Unknown  /  8:55 pm  /  , , , ,   /  No comments

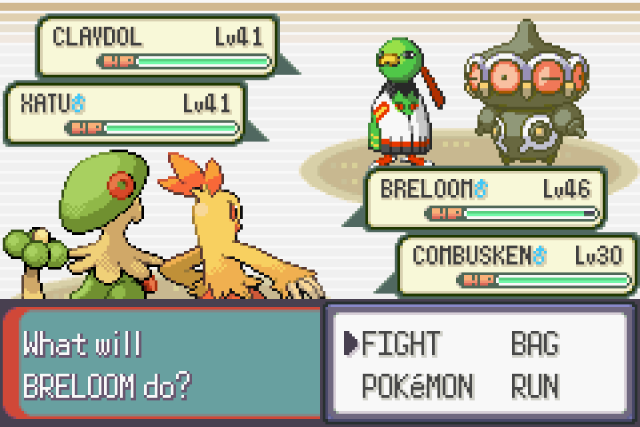
Quite an old post, But for all Pokemon fans out there! You can now play the famous creature-collecting game on your Android device. The game is not available from the Google Play Store, but many hardcore fans use Gameboy and DS emulators just to play Pokémon. Gameboy versions of Pokémon are light enough to work well on Android devices.

Part 1: Getting An Emulator:

Determine which version of Pokémon you want to play. There are many different versions of Pokémon that have been released for all of the different Gameboys over the years. You will need a different emulator depending on which version you want to play.

  • Red, Blue, Green, Yellow - Original Gameboy or Gameboy Color emulator
  • Ruby, Sapphire, Emerald, FireRed, LeafGreen - Gameboy Advance emulator
  • Diamond, Pearl, Platinum, HeartGold, SoulSilver, Black, White, Black 2, White 2 - Nintendo DS emulator
  • X, Y - Not currently possible
Find the right emulator. Once you have determined which version you want to play, you will need to download the right emulator. This program pretends to be the Gameboy system on your Android device, allowing you to run ripped versions of the game (called ROMs). Below are some of the more popular emulators available on Android, though this list is not exhaustive:
  • Gameboy/Gameboy Color - GBCoid
  • Gameboy Advance - GBAoid or John GBA Lite
  • Nintendo DS - DraStic
Check the system requirements. Before downloading an emulator, ensure that your phone meets the system requirements for the app. Some of the newer emulators such as DraStic may only run on newer devices. All apps will post their system requirements in the App Description.

Install the emulator. Different emulators have different installation methods, but generally it's pretty straightforward. John GBA Lite and DraStic can be installed from the Play Store, but GBCoid and GBAoid need to be downloaded from a browser and installed manually:

  • Open your device's Settings menu.
  • Tap Security.
  • Check the "Unknown sources" box.
  • Download the emulator from its website, or copy the APK file onto your Android device from your computer.
  • Find the APK file on your device using a File Explorer app. Tap it to install the app.
Download the Gameboy Advance BIOS file. If you are installing a Gameboy Advance emulator, you will need to download a separate BIOS file. This file is not included for legal reasons, but can easily be found online by searching for "gba_bios.bin"
  • Place this BIOS file somewhere on your phone that is easy to find. It is recommended that you place it in the same folder that you will be placing your ROM files in.
  • You will be asked to locate the BIOS file when you start your Gameboy Advance emulator for the first time.
Part 2: Downloading A Pokemon Rom:

Find a ROM site. There are a variety of sites online that allow you to download ROM files for various Gameboy games. These sites vary in legality, and many of the shadier ones may be littered with popups and scams, so make sure that you downlaod from a more trusted site, such as www.coolrom.com.

  • You can use the browser on your mobile phone to download the ROM files, or you can download them on your computer and then copy them onto your phone.
Browse for the Pokémon game you want. Find the section of the website that contains the Pokémon game you want to get. For example, if you want Pokémon Black, you'll need to find the Nintendo DS section. If you want Sapphire, find the Gameboy Advance section.

Download the ROM. If you are using your mobile browser, download the ROM .zip file onto your device. If you are using your computer, download it and then transfer it to your mobile device.


Place the ROM in a dedicated folder. You may find it easier to collect all of your ROM files in one place, especially if you are downloading multiple games. You can use a file manager app on your phone to move the files to a dedicated folder, or you can plug your device into your computer and use Windows Explorer to move files around.


Part 3: Playing The Pokemon Game:


Open your emulator. Depending on which emulator you chose, the process for opening ROMs may vary. Some emulators will ask you to browse for the ROM immediately when you launch the emulator, others you will need to tap "Load ROM" or "Open".

  • Some emulators such as GBAoid will prompt you for your ROM folder location. This is when having all of your ROMs in one location will make things much easier.
Select your game. After the app completes its search, the list of games you have downloaded will appear on the menu. To play, simply tap on the name and the game will start automatically.

Start playing. Most emulators will place virtual buttons on the touchscreen that emulate the physical directional pad and buttons on a Gameboy. Use these to control just as you would on a real Gameboy. Many emulators allow you to choose where these buttons appear, or allow you to connect another controller via Bluetooth.


This is not only for Android, If you wish to play Pokemon on your PC, Download Visual Boy Advance Emulator.

Subscribe for more post right into you email inbox!

Sunday, 20 July 2014

Unknown  /  7:03 pm  /  , ,   /  No comments
You start working on someone else's, or may be a public computer and you realise that all your important files are on Dropbox (or Google Drive). And you've always hated their web versions. What do you do now? How about a thumb drive running the portable version of those tools? Not only for Dropbox but for all your favorite apps!

A portable app is a computer program that you can carry around with you on a portable device and use on any Windows computer. When your USB flash drive, portable hard drive, iPod or other portable device is plugged in or your cloud drive is synced, you have access to your software and personal data just as you would on your own PC. And when you unplug the device, none of your personal data is left behind.

No Special Hardware - Use any USB flash drive, portable hard drive, iPod/MP3 player, etc
No Additional Software - Just download, run the portable installer and go
No Kidding - It's that easy

Consider the Possiblities...
  • Your favorite web browser with all your bookmarks close at hand
  • Your presentation AND the required software ready to go for that big meeting
  • Your important passwords and account information securely encrypted and always with you
  • Your antivirus program and other utilities ready to fix PC problems
  • Your calendar with all your appointments
  • Your own email client with all your contacts and settings
  • Your instant messenger and your buddy list
  • Your whole office suite along with all your documents

PortableApps.com is the world's most popular portable software solution allowing you to take your favorite software with you. A fully open source and free platform, it works on any portable storage device (USB flash drive, memory card, portable hard drive, etc), cloud drive (DropBox, Google Drive, etc), or installed locally. With millions of users all over the world and a full collection of open source software as well as compatible freeware and commercial software and partners in the software and hardware industry, PortableApps.com is the most complete solution for life on the go.

For more information, visit PortableApps.com

Saturday, 31 May 2014

Unknown  /  11:52 am  /  , , , ,   /  2 comments
 EDIT: This trick is obsolete.


Googling for something, I caught up with an awesome trick to download 'apk files' directly from Google Play. Previously I have already posted a trick to download Apk files from Play Store, But this method is more easier and time saving! Your device may not be as powerful as Nexus, Moto G or some high-end phone, But if you think your phone can handle the game which is marked 'Incompatible', This trick will surely be useful to you. Ok, Now Coming to the trick:

STEP 1: Go to Play Store Website and search for the game you would like to download.
STEP 2: The game's URL should look something like 'www.play.google.com/.......' All you have to do is replace the 'play.google.com' part with 'apk-dl.com'
STEP 3: The download box should popup prompting to download the apk file, Download it and install it to your device.

This trick is well tested on many phones and works properly.Alternatively, You can visit www.apk-dl.com and place the Play Store link and download the app.

Hope you enjoyed this trick. Subscribe for more tricks right into your E-Mail Inbox for free!
© 2016 Useless Games! All contents and other copyrights are properties of their respective owners.

Search