Showing posts with label How To. Show all posts

Tuesday, 19 April 2016

Shrihari Prakash  /  4:12 pm  /  , ,   /  3 comments
DOWNLOAD YOUTUBE VIDEOS WITHOUS ANY SOFTWARES LIKE IDM / YTD ... SIMPLEST WAY..

* First go to YouTube , Search and play the video you want to download.
* Now to download, just replace the " www. " with "ss" in the url and hit enter.


It will redirect you to page where you get download options like 720 p, 1080p, or audio mp4 .

First Posted: Mar 2013
Last Updated: Apr 2016

Tuesday, 13 January 2015

Unknown  /  12:36 pm  /  , , ,   /  No comments
Most of the times, Complex Windows operations come handy in just a few simple Command Prompt commands.

Hiding a partition is a good idea when you want to prevent others from accessing your personal files. You don't need any special software to do it. Below are the steps to hide Drives with the help of Windows Command Prompt:

 How to hide the Drives?

Step 1: Hold down the Windows key and press R.

Step 2: Now cmd in the Input Box and hit Enter Key.

Step 3: Now the Command Prompt window will popup. Type Diskpart and hit Enter.

You are now asked if you want to allow the program to make changes in the computer. Hit the Yes button and another window should have popped up by now.

Step 4: Now, Type list volume and hit Enter to see the list of available Drives.

Step 5: In my case, I'm going to hide the E Drive. You may hide any Drive you wish. Now I'll type Select volume E and hit Enter. Now we have selected the Drive to be hided successfully.

Step 6: To hide the Drive, Remove letter E is typed and Enter is pressed.

Now the selected drive is Hidden successfully!

Neat! Now now do I un-hide the drive?

This process is also easy as well!

Step 1: Scroll Back and perform the Steps 1,2,3,4 and 5 again.

Step 2: By now, You must have selected the volume that is to be recovered. To un-hide the Drive, Type Assign letter E (In my case!) and hit Enter. The Drive should have been Recovered!

Happy Hiding!
e Ноw tо Hide Drives with CMD ?
Ноw tо Hide Drives with CMD ?

Monday, 12 January 2015

Unknown  /  3:08 pm  /  , , ,   /  No comments

Downloading a 1GB file on a Ultra Slow network....
*10% Complete...*
*58% Complete...*
*99% Complete...*
...
...
*BANG! Download failed due to connection error!*

At least once in a lifetime, you would have experienced this! If your tired constantly trolled by "DOWNLOAD FAILED!!" messages, Rejoice now! the failed downloads can be resumed right from the point where it failed! Just follow the below steps:

Step 1: Navigate to the folder that contains the un- finished file.
Step 2: Backup the file to another folder. (Don't copy, just move!)
Step 3: Now, search for the same file that previously failed to download.(Trust me, we are going to resume it!) The file name should match the un- finished file or else rename the unfinished file.
Step 4: Click Download button (Trust me again!) and let the download run for 10 to 20 kb.
Step 5: Now, Pause the download. Navigate to the currently downloading folder and replace the currently downloading file with the unfinished file.
Step 6: Now click the resume button.

Viola! Your download should resume where it failed! Although this does not work for all browsers, It works on majority of browsers. I've tried this trick on Firefox for Windows and Opera Mini for Android.

For more posts right into your E-Mail inbox, Subscribe for E-mail posts!

Sunday, 28 September 2014

Unknown  /  2:26 pm  /  , , ,   /  No comments

Now-a-days almost all 3rd party software require Microsoft .NET Framework installed in your system. The required .NET Framework version might be different for different software and the most required .NET Framework version is 3.5 which comes preinstalled in Windows 7.
If you are using Windows 8, you might face a problem while trying to run a program which requires .NET Framework 3.5 version. Windows 8 doesn't come with .NET Framework 3.5 version. It comes with the latest .NET Framework 4.5 version preinstalled.
Whenever you try to open a program requiring .NET Framework 3.5, you get following message:
An app on your PC needs the following Windows feature:
.NET Framework 3.5 (includes .NET 2.0 and 3.0)
There are 2 buttons given to install the .NET Framework version or to skip the installation. If you decide to install it, Windows tries to connect to Internet to download the setup files of .NET Framework 3.5.
That's strange because Windows 8 setup contains .NET Framework 3.5 setup files but still Windows tries to connect to Internet. It would have been better and easier if Windows 8 installed the .NET Framework 3.5 without Internet connection just like it does for other Windows components such as Media Center, Internet Explorer, etc which can be installed or uninstalled using "Programs and Features" applet in Control Panel.
If you don't have an Internet connection or if you don't want to waste time and bandwidth in downloading the setup files, here is a way to install .NET Framework 3.5 offline in Windows 8.
Today in this tutorial, we'll tell you how to install .NET Framework 3.5 in Windows 8 without any need of Internet connection. You can install it offline with the help of a single command. This method requires Windows 8 setup disc or ISO file so make sure you have Windows 8 setup files with you.
 The following are the steps to enable .NET Framework 3.5 (include .NET 2.0 and 3.0) feature in offline mode :

Step 1 :
Insert Windows 8 DVD or mount ISO image. The source of this feature can be found in folder E:\sources\sxs. (In this case E:the user’s drive letter on which the user has loaded Windows 8 Media.)


Step 2 :
Open CMD.EXE with Administrative Privileges. 

Step 3 :
Run the following command Dism.exe /online /enable-feature /featurename:NetFX3 /All /Source:E:\sources\sxs /LimitAccess, and hit Enter. 
After completing the installation of .NET Framework 3.5 you can see that the feature is enabled!

Sunday, 3 August 2014

Unknown  /  8:55 pm  /  , , , ,   /  No comments

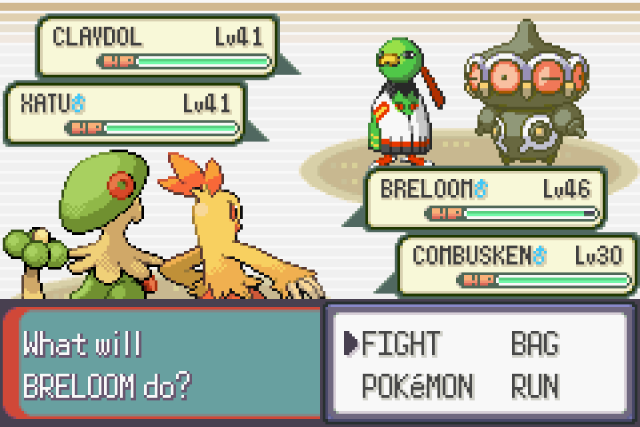
Quite an old post, But for all Pokemon fans out there! You can now play the famous creature-collecting game on your Android device. The game is not available from the Google Play Store, but many hardcore fans use Gameboy and DS emulators just to play Pokémon. Gameboy versions of Pokémon are light enough to work well on Android devices.

Part 1: Getting An Emulator:

Determine which version of Pokémon you want to play. There are many different versions of Pokémon that have been released for all of the different Gameboys over the years. You will need a different emulator depending on which version you want to play.

  • Red, Blue, Green, Yellow - Original Gameboy or Gameboy Color emulator
  • Ruby, Sapphire, Emerald, FireRed, LeafGreen - Gameboy Advance emulator
  • Diamond, Pearl, Platinum, HeartGold, SoulSilver, Black, White, Black 2, White 2 - Nintendo DS emulator
  • X, Y - Not currently possible
Find the right emulator. Once you have determined which version you want to play, you will need to download the right emulator. This program pretends to be the Gameboy system on your Android device, allowing you to run ripped versions of the game (called ROMs). Below are some of the more popular emulators available on Android, though this list is not exhaustive:
  • Gameboy/Gameboy Color - GBCoid
  • Gameboy Advance - GBAoid or John GBA Lite
  • Nintendo DS - DraStic
Check the system requirements. Before downloading an emulator, ensure that your phone meets the system requirements for the app. Some of the newer emulators such as DraStic may only run on newer devices. All apps will post their system requirements in the App Description.

Install the emulator. Different emulators have different installation methods, but generally it's pretty straightforward. John GBA Lite and DraStic can be installed from the Play Store, but GBCoid and GBAoid need to be downloaded from a browser and installed manually:

  • Open your device's Settings menu.
  • Tap Security.
  • Check the "Unknown sources" box.
  • Download the emulator from its website, or copy the APK file onto your Android device from your computer.
  • Find the APK file on your device using a File Explorer app. Tap it to install the app.
Download the Gameboy Advance BIOS file. If you are installing a Gameboy Advance emulator, you will need to download a separate BIOS file. This file is not included for legal reasons, but can easily be found online by searching for "gba_bios.bin"
  • Place this BIOS file somewhere on your phone that is easy to find. It is recommended that you place it in the same folder that you will be placing your ROM files in.
  • You will be asked to locate the BIOS file when you start your Gameboy Advance emulator for the first time.
Part 2: Downloading A Pokemon Rom:

Find a ROM site. There are a variety of sites online that allow you to download ROM files for various Gameboy games. These sites vary in legality, and many of the shadier ones may be littered with popups and scams, so make sure that you downlaod from a more trusted site, such as www.coolrom.com.

  • You can use the browser on your mobile phone to download the ROM files, or you can download them on your computer and then copy them onto your phone.
Browse for the Pokémon game you want. Find the section of the website that contains the Pokémon game you want to get. For example, if you want Pokémon Black, you'll need to find the Nintendo DS section. If you want Sapphire, find the Gameboy Advance section.

Download the ROM. If you are using your mobile browser, download the ROM .zip file onto your device. If you are using your computer, download it and then transfer it to your mobile device.


Place the ROM in a dedicated folder. You may find it easier to collect all of your ROM files in one place, especially if you are downloading multiple games. You can use a file manager app on your phone to move the files to a dedicated folder, or you can plug your device into your computer and use Windows Explorer to move files around.


Part 3: Playing The Pokemon Game:


Open your emulator. Depending on which emulator you chose, the process for opening ROMs may vary. Some emulators will ask you to browse for the ROM immediately when you launch the emulator, others you will need to tap "Load ROM" or "Open".

  • Some emulators such as GBAoid will prompt you for your ROM folder location. This is when having all of your ROMs in one location will make things much easier.
Select your game. After the app completes its search, the list of games you have downloaded will appear on the menu. To play, simply tap on the name and the game will start automatically.

Start playing. Most emulators will place virtual buttons on the touchscreen that emulate the physical directional pad and buttons on a Gameboy. Use these to control just as you would on a real Gameboy. Many emulators allow you to choose where these buttons appear, or allow you to connect another controller via Bluetooth.


This is not only for Android, If you wish to play Pokemon on your PC, Download Visual Boy Advance Emulator.

Subscribe for more post right into you email inbox!

Saturday, 31 May 2014

Unknown  /  11:52 am  /  , , , ,   /  2 comments
 EDIT: This trick is obsolete.


Googling for something, I caught up with an awesome trick to download 'apk files' directly from Google Play. Previously I have already posted a trick to download Apk files from Play Store, But this method is more easier and time saving! Your device may not be as powerful as Nexus, Moto G or some high-end phone, But if you think your phone can handle the game which is marked 'Incompatible', This trick will surely be useful to you. Ok, Now Coming to the trick:

STEP 1: Go to Play Store Website and search for the game you would like to download.
STEP 2: The game's URL should look something like 'www.play.google.com/.......' All you have to do is replace the 'play.google.com' part with 'apk-dl.com'
STEP 3: The download box should popup prompting to download the apk file, Download it and install it to your device.

This trick is well tested on many phones and works properly.Alternatively, You can visit www.apk-dl.com and place the Play Store link and download the app.

Hope you enjoyed this trick. Subscribe for more tricks right into your E-Mail Inbox for free!

Tuesday, 8 April 2014

Muruvazhakan  /  1:52 pm  /  , , , ,   /  No comments
Whatsapp is considered to be most sought-after messenger for Apple iOS, Android, Nokia S40 and Symbian 60, Blackberry and Windows Phone. Apart from sending texts, users can also share audio and video files as well as images. However, it offers these facilities with some limitations

  1. Users can share videos, images and audio only. It doesn’t come with any built-in function that can allow users to share Doc, PDF, APK and more.
  2.  The size of any file to be share shouldn’t exceed 16 MB. It means videos over 16 MB cannot be shared. However, Whatsapp comes with functionality to compress or trim video files before you share.  However, it still has limitation. Sending very large videos is not possible.
  3. While sending images, Whatsapp compresses and sends it to the recipient. Though you cannot find any difference on mobile, one can notice the quality reduction in computer. It will reduce the quality if you send HD images.
These were the critical problems with Whatsapp. But you can share any video, image, audio or any other type of file through third-party sources without compromising quality and share them with your buddies. However, it can be a bit lengthy. So, have a look on some easy steps to share media to your friends with no loss of quality. All you need are Dropbox and CloudSend for Android.

Steps to Share PDF, ZIP or APK files
  1. First of all, download and install official Dropbox app. There is no problem if you have Dropbox account already. Signup for an account if you don’t have one. Login to it.
  2. Then download and install CloudSend. When you launch the app, you will go through a quick tour. All you have to swipe from right to left on your device’s screen. It will ask you to authorize this app by the end. All you have to click Allow. In your Dropbox folder, a folder will automatically be created named “CloudSend”. You will be able to control it completely. Now you can close the app after completing the authorization.
  3. In order to send any type of file, press and hold the file through file manager and choose Share button.
  4. Choose CloudSend option from popup.
  5. Hold on while the selected file is being uploaded on CloudSend folder created on Dropbox. The duration of file transfer vary according to the connection speed and size of file. The best part of CloudSend is that it doesn’t have any restrictions regarding file size. You will have two options after completion of upload – Copy and Share. Either you can share file or copy the link of any file directly.
  6. When you select Share, you will be able to share your file in different platforms like Email, Whatsapp, SMS, Google+, WeChat, Facebook and other applications your device have. Select WhatsApp.
  7. It will prompt you to choose WhatsApp contacts you want to share that link with. Share that link with your desired recipient. It will show link with file name. If file is supported on your friend’s device, it will show the preview of file. Or file can also be downloaded through other browser.

Enjoy your sharing!!!

For More Posts Right Into Your Email Inbox, Subscribe For Email Posts!!

Monday, 7 April 2014

Muruvazhakan  /  10:33 pm  /  , , ,   /  No comments
EDIT: This Method Does Not Work Anymore

Guys Subway Surfer Game is getting more and more popular. In very less time, Subway surfer has become so Popular that it can be found on 90 % of android devices.


Saturday, 8 February 2014

Unknown  /  3:28 pm  /  , , , ,   /  No comments
Many websites offer specific interfaces for smartphones, iPads, and other mobile devices. Whether you need to test mobile websites or you’re just curious to see what they look like, you can access them in your desktop browser.


User Agent Switcher Extensions:
For ease-of-use, you will probably want to install a browser extension that lets you quickly and easily change your browser’s user agent.
You will want to install either User-Agent Switcher for Chrome or User Agent Switcher for Firefox, depending on which browser you use. For Internet Explorer, you may want to try the UAPick User-Agent Switcher add-on.
Setting a Mobile User Agent:
To change your user agent, locate the User Agent Switcher extension icon on your browser’s toolbar, click it, and select a mobile user agent in the list.
(You may need to add the User Agent Switcher icon to Firefox’s toolbar after installing it. To do so, right-click the toolbar, select Customize, and drag and drop the User Agent Switcher icon onto Firefox’s toolbar.)
Refresh the page you are currently on (click the Refresh icon on the toolbar or just press F5) and you will see its mobile version. You can access other websites and you will see their mobile versions for as long as your user agent is set to a mobile user agent.

Thursday, 6 February 2014

Unknown  /  9:15 pm  /  , , , , ,   /  No comments
Hello guys, here I am a back with a very useful trick that how to download android apk files directly to computer from Google playstore. I think I don't need  to explain the importance or about fame of Playstore to you. You just need to follow the simple steps for downloading.


1. Go to the following link[Simply you can Google it as "apk downloader"]
2. Now copy the link of any app from Google play-store.
3. And paste it in the site mentioned in step1 and wait for few seconds for generating the link to download.
4. Now click on the download button to download the apk file directly to your PC.

Subscribe To For More Posts Coming Straight To Your E-Mail Inbox!

Monday, 2 December 2013

Unknown  /  8:32 pm  /  , ,   /  No comments
Short but useful post. If you are thinking of creating their own run command, Yes !!! you can create our own
run command.
Run Program is started by going to Start ►Run, (Or) by Pressing Winkey+R.

Step 1: Create the shortcut for the folder or tool for which you need to create the shortcut.

Step 2: Open the run command and goto \Windows

Step 3: Paste the shortcut to that folder and change the name of the shortcut to run command as we want.

Now we can open the folder, tool, or even a song from run command using the name we have given for the shortcut.

Friday, 27 September 2013

Unknown  /  5:06 pm  /  , , ,   /  No comments
I think everyone will agree with me that we use Google for searching anything at least once a day. Be it weather forecast, dictionary meaning or something else. But we can use Google Search Feature more effectively. Lets have a look how we can use Google Search effectively.

 Weather:  You can search weather followed by name of any city to get the current weather and forecast. Example - Weather Oslo

∙ Calculations: Google search can be used to do arithmetic calculations. Example - 35 x 1.75

∙ Places: If you want to find out what is the name of the capital of any country, just type capital followed by country name. Example - Capital Belgium

Thursday, 26 September 2013

Muruvazhakan  /  7:45 pm  /  , ,   /  No comments

Hi everyone. So now today we will see how to play puzzle game with your video In VLC player.
While playing a video in vlc you can puzzle up your video and try to un puzzle it with fun.

Now you will see a box like this :


Cool! Isn't it?? So lets check how it is done, 


Follow the below steps.

1) First of all opent VLC media player.

Sunday, 11 August 2013

Unknown  /  10:29 pm  /  , , ,   /  No comments
Android is the Google’s most famous operating system for mobiles. Many companies are supported Android on their mobile phone because of its applications and many other amazing functions. Android is used almost everywhere in these days. Also they release new version with amazing features.Android 4.3, Jelly Bean improves on the speed and simplicity of Android 4.1 and includes all new features – Photo Sphere and a completely redesigned camera app, new Gesture Typing keyboard, Google Now with all new cards, and much more.Android 4.3, an even sweeter Jelly Bean, is available now on Nexus phones and tablets.Restricted profiles limit access to apps and content, at home with your family and at work. Bluetooth Smart support makes Android ready for a whole new class of mobile apps that connect to fitness sensors. Games look great thanks to the 3D realistic, high performance graphics powered by OpenGL ES 3.0.And there's a lot more new in this release, Check them out!

Thursday, 8 August 2013

Unknown  /  7:30 pm  /  , , ,   /  No comments
In Today's Day-to-Day Life,People Search for Online Tools/Apps to Complete thier Work Quickly and Efficiently. Most of The Time I Search for Online Video Converter Tool Which can Convert my Video or Audio to any Format That i want.

There are Many Video Converters Available , But You have to spend some bucks on them, So To make this Process Fast And Free, i Found a Tool Called Apowersoft Free Online Video Converter . This is a freeware video convereter.
Using This Tool you can Convert any Video to Any Format of Your Choice Very Fast.

There is No such limits on Number of Conversions, You can convert as many videos you want, that to for FREE and without installing a single program on your Pc which means you are free to convert any number of videos without limits!


Even a Newbie to Internet World will be able to Convert Videos of His/Her Choice easily.


Apowersoft Free online video converter Supports Number of Output Formats, which includes MP4, AVI, MOV, WMV, MKV,MPG, 3GP, FLV, MP3, WAV, WEBM and lots more.
Talking About the Quality of the converted videos,Then it is Awesome according to me,  Inspite of being a Free Tools, Apowersoft Provides The Clearest video and Output Quality that you can get.

In my point, this Converter is supreme to all other converters out there online. feel free to try it out!

Wednesday, 7 August 2013

Unknown  /  9:48 pm  /  , , ,   /  No comments
If you dint have free messages on your phone and you need to sent urgent SMS,I hope this topic is most useful for everyone. Because SMS and chat is very essential and needed thing for every one. As we already seen How to Create Multiple Accounts in a Website With One E-Mail ID.  Now we are going to see Send Free SMS From Google (Gmail). Believe me, its very simple...


Google is a number one site in this world. It also earns more money with online. It is the number one one online earning site.  It'll provide many products to their users like Gmail, blogger, Youtube, Maps and etc... Now Google introduce the new product "SMS (text messaging) in Chat". Using this we can able to send free SMS and  receive the replies in chat box.

STEPS

  • Log in into your Gmail account.
  • Click on settings it will be in top right corner like below picture.

  • In that settings click on labs.
Send Free SMS From Google (Gmail)
  • Click Enable to this gadget "SMS (text messaging) in Chat".
  • Go to chat and type your contact name in search box then it will shown send SMS option like below picture. Click on that. 
                         
  • If your contact name already contains mobile number it will goes on chat box directly otherwise it will ask to enter mobile number like below Image. Enter the mobile number.

  • Then you can get a small dialogue box to send SMS. 

  • Enter the message and hit enter. The message will be sent. If the person replying you by SMS the message will be displayed in your chat box.
This is the simple way to chat with your friends using Gmail.

NOTE

Google gives 50 credits per day. If you send one SMS your credit is decreased one. In the same time if you receive a reply by the person you can get 5 credits. So you can able to chat unlimited messages with gmail. It is very easy. So give this trick a try. Im sure you will find it uselful....

Hope the tutorial helped. Subscribe for more post Straight on your email inbox.

Friday, 19 July 2013

Unknown  /  7:06 pm  /  , ,   /  No comments
The Blue Screen Of Death (TBSOD) the most awe full problem in Windows which indicates that your computer is in some Critical problem. At the time of error, the Screen turns Blue and then freezes which requires Re-Booting. 

CAUSES AND SOLUTIONS:

Driver Errors:
It is the Number 1 cause of The Blue Screen Of Death. Drivers can easily get corrupted. Only way to this is Updating your Computer drivers Using driver updater.

Registry Errors:
As Registry is an Important section of computer, Make sure their Dictionary work properly to avoid System Error and Blue Screen. WINDOWS REGISTRY CLEANER is a excellent software that removes unwanted components of registry.This software can increase efficiency of the computer.

Physical Errors:
If your Random Access Memory(RAM) is too old(more than six years), Replace it with a new one. Also Keep Computer Hardware out of dust by cleaning it regularly.

Additional Tips:
  • Run Disk Derangement Occasionally.
  • Delete Unwanted files
  • Keep it physically clean
  • Update your Anti-Virus  Software

And POOF! your away From the Blue Screen Problem...
If This article was helpful, Please Share and Subscribe for email posts...

Saturday, 13 July 2013

Unknown  /  12:10 pm  /  , , ,   /  No comments
If you have ever dreamt of creating PC Games and when you don't have enough Programming knowledge, We have a perfect solution for you! Game Maker is a software which allows users to make games and publish them without any prior programming knowledge. Game maker uses Drag-and-Drop interface which makes game creation easy and fun. Once you have mastered in these Drag-and-Drop functions, Game maker has an Inbuilt Programming language called The GML(Game Maker Language) which unleashes the full power of game making!And you an even sell your creations without any fee. Game maker has a lite and Pro version so that you can try and buy. Download Game Maker here. And also checkout games made with Game Maker Here.


Game Maker 8 Crack: Download (Only for trying. Please Buy The Original Version!)

Thursday, 27 June 2013

Unknown  /  7:34 pm  /  , , ,   /  No comments
CLICK HERE to download KGB
The most common problem that gamerz face is that they couldn't transfer large games into their pendrive.KGB archiver has a perfect solution for this. KGB has the highest compression rate that has abitity to convert 3GB files to 3MB! But it also has drawbacks like,
Takes hours or even days to complete archiving! And KGB archiver is needed to extract compressed files...
Other than this, KGB Archiver is the best archiver with best best compression rate...

Saturday, 27 April 2013

Shrihari Prakash  /  11:31 pm  /  , , ,   /  No comments
Blackmart Alpha is an useful app that provides almost all the paid android apps and games for free... this app is a large database of android apps and games which is almost equal the Play Store. It shows some annoying ads, but it shouldnt' bother that much. It also shows updates for installed apps on your droid! The store is frequently updated to fulfill all your needs.

Download Blackmart Alpha
© 2016 Useless Games! All contents and other copyrights are properties of their respective owners.

Search